Using Lobe.ai with Forge
In this tutorial you will learn how to make a custom model using Lobe.ai and test it using forge! We want to demonstrate how easy it is to from training a model to actually testing and using it in real world on your phone. The steps are:
- Creating a custom model with Lobe.ai
- Packaging the model with Hammer Forge Studio
- Testing the model with the Forge test suite and mobile app
Setup
Get Lobe.ai! Lobe.ai is a rapid training tool for machine learning models. Currently, it supports computer vision models but they have more model types coming soon.
Get an account a free Studio account. Using studio you will be able to build the ML pipeline around your ML Pipeline.
Also get the Runic Mobile app that you will use to test your EdgeML pipeline. The runic mobile app is available on iOS and Android.
Step 1: Collect Some Data!
I will be making a simple coffee or not coffee CV detection model. To do that I need to collect some images :) The video below shows how you can do this using the lobe.ai app.
Step 2: Train your model!
Lobe will train a model on your data seemlessly! You can see this on the train sidebar link.
Step 3: Export a TFLite optimized model!
Go to the use tab and click the export button. Select TFlite as your output, this will take a bit of time.
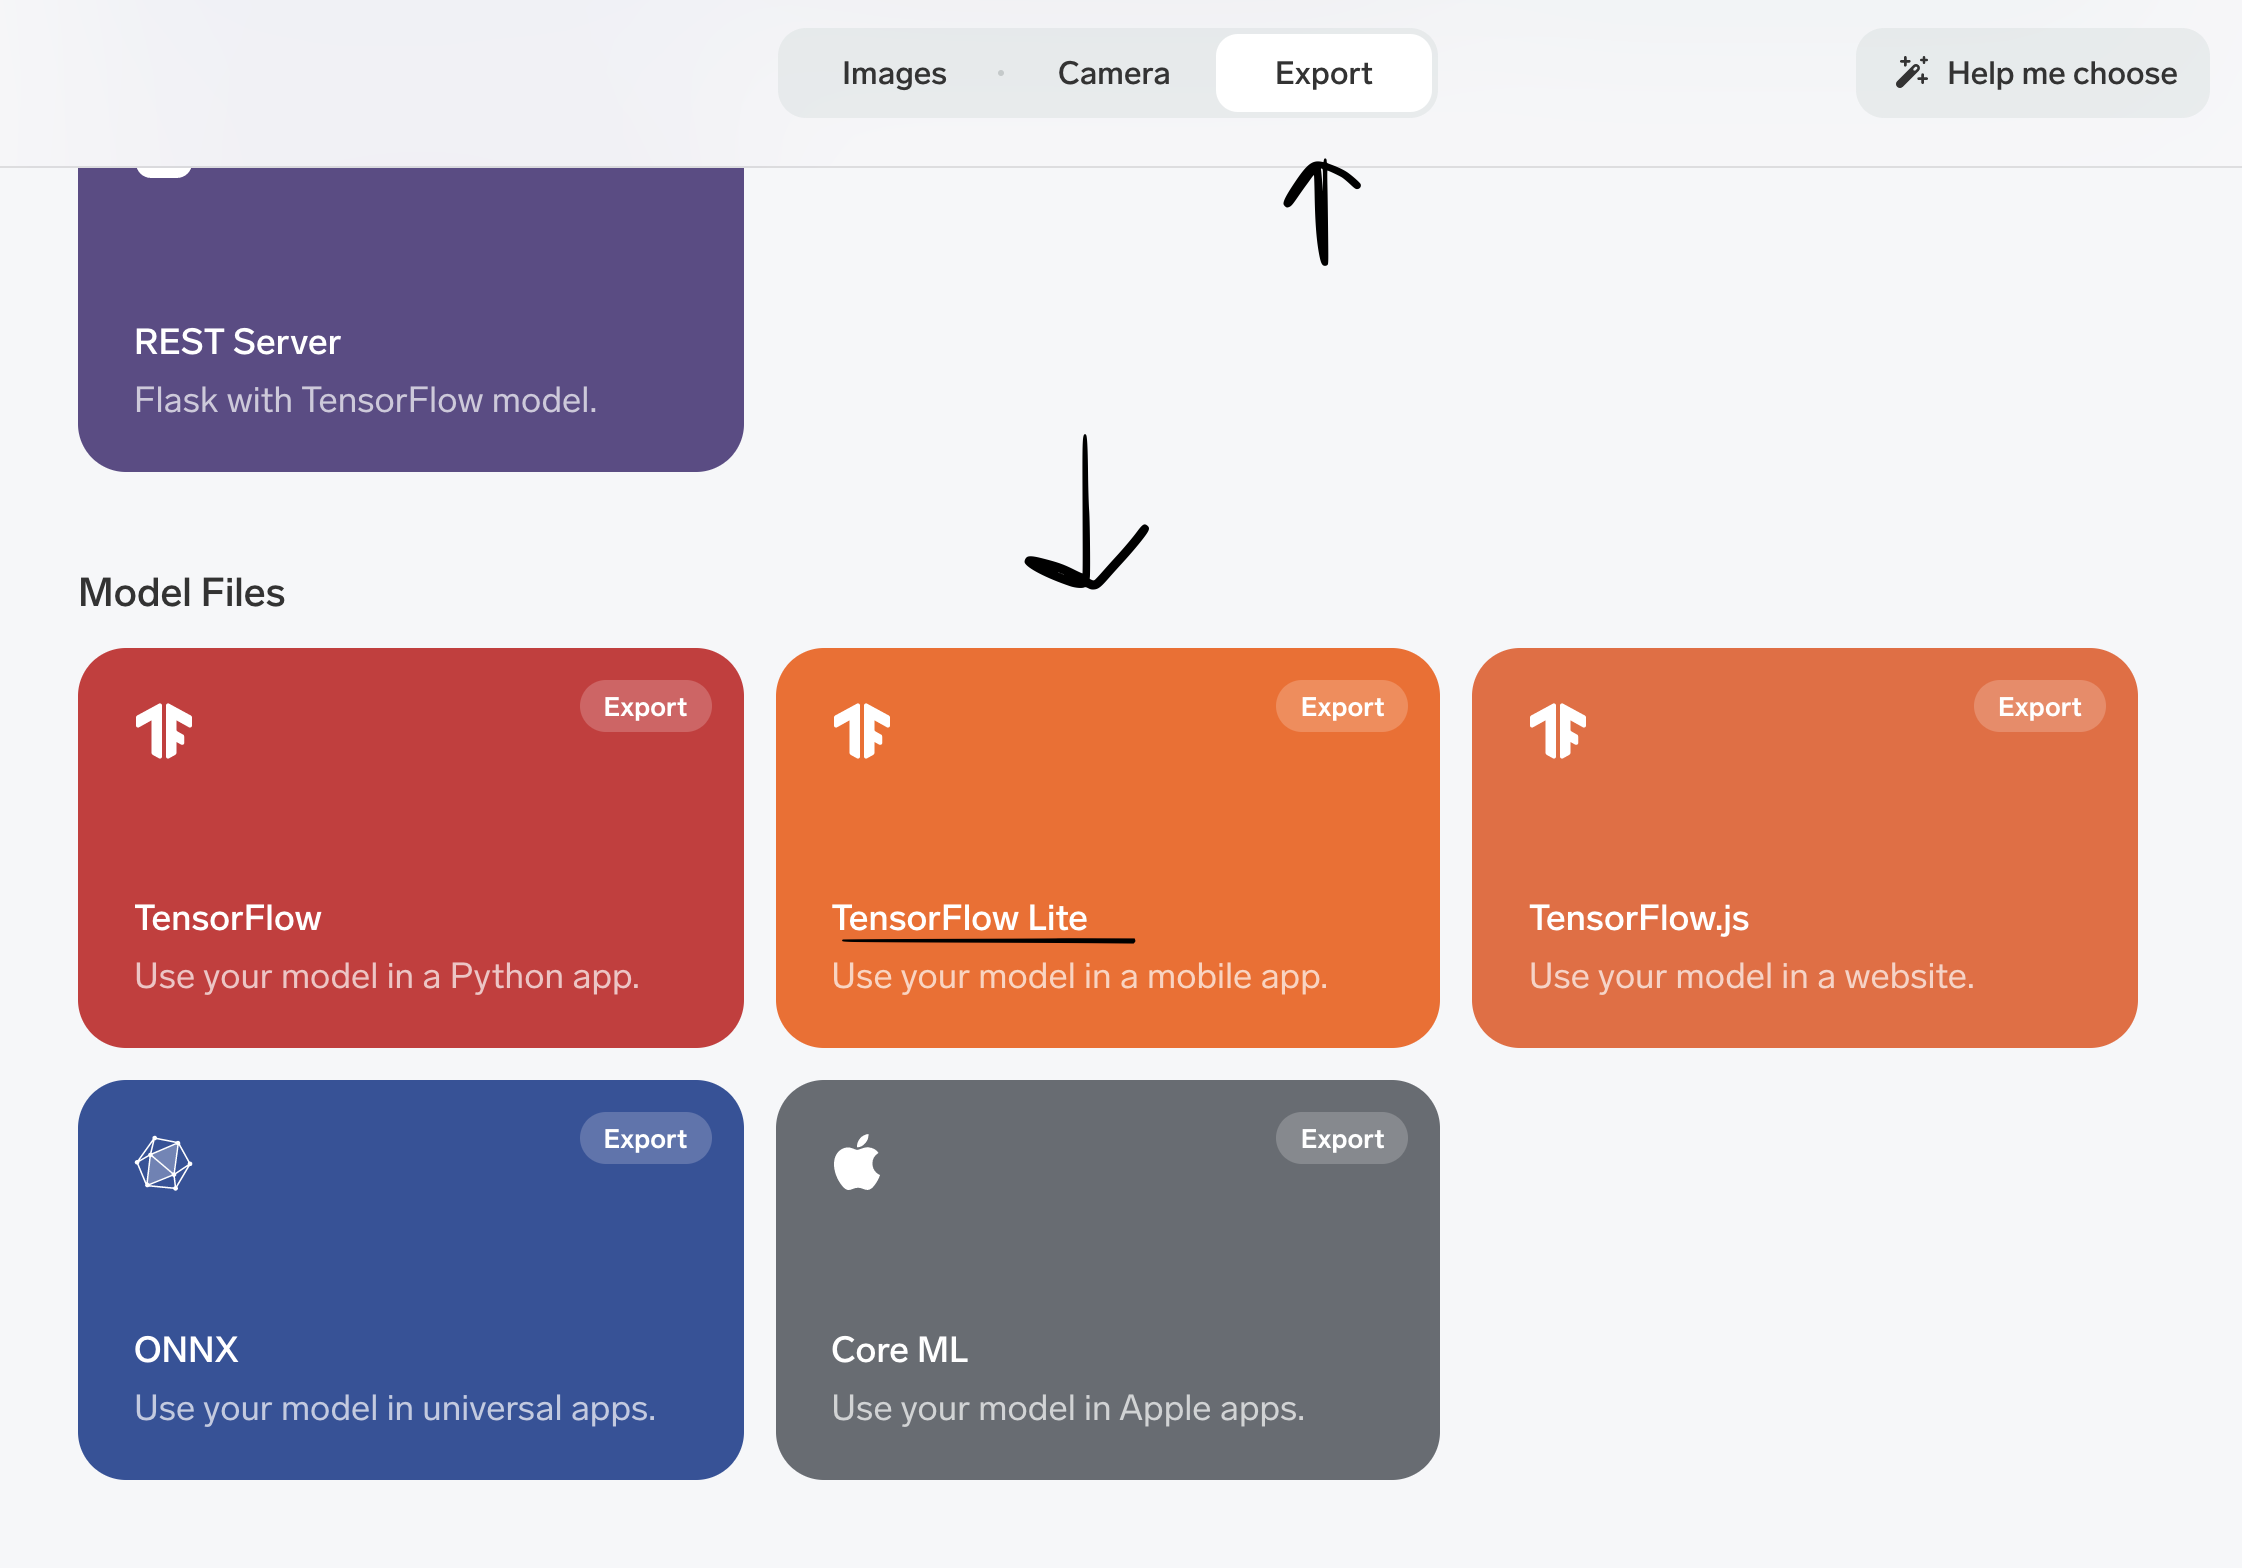
Once it is done exporting it will create a folder which will have two files we need. One is the saved_model.tflite and the other is labels.txt.
Step 4: Start a Computer Vision project on Studio :)
Head over to the Studio and create a new project with the inception template.
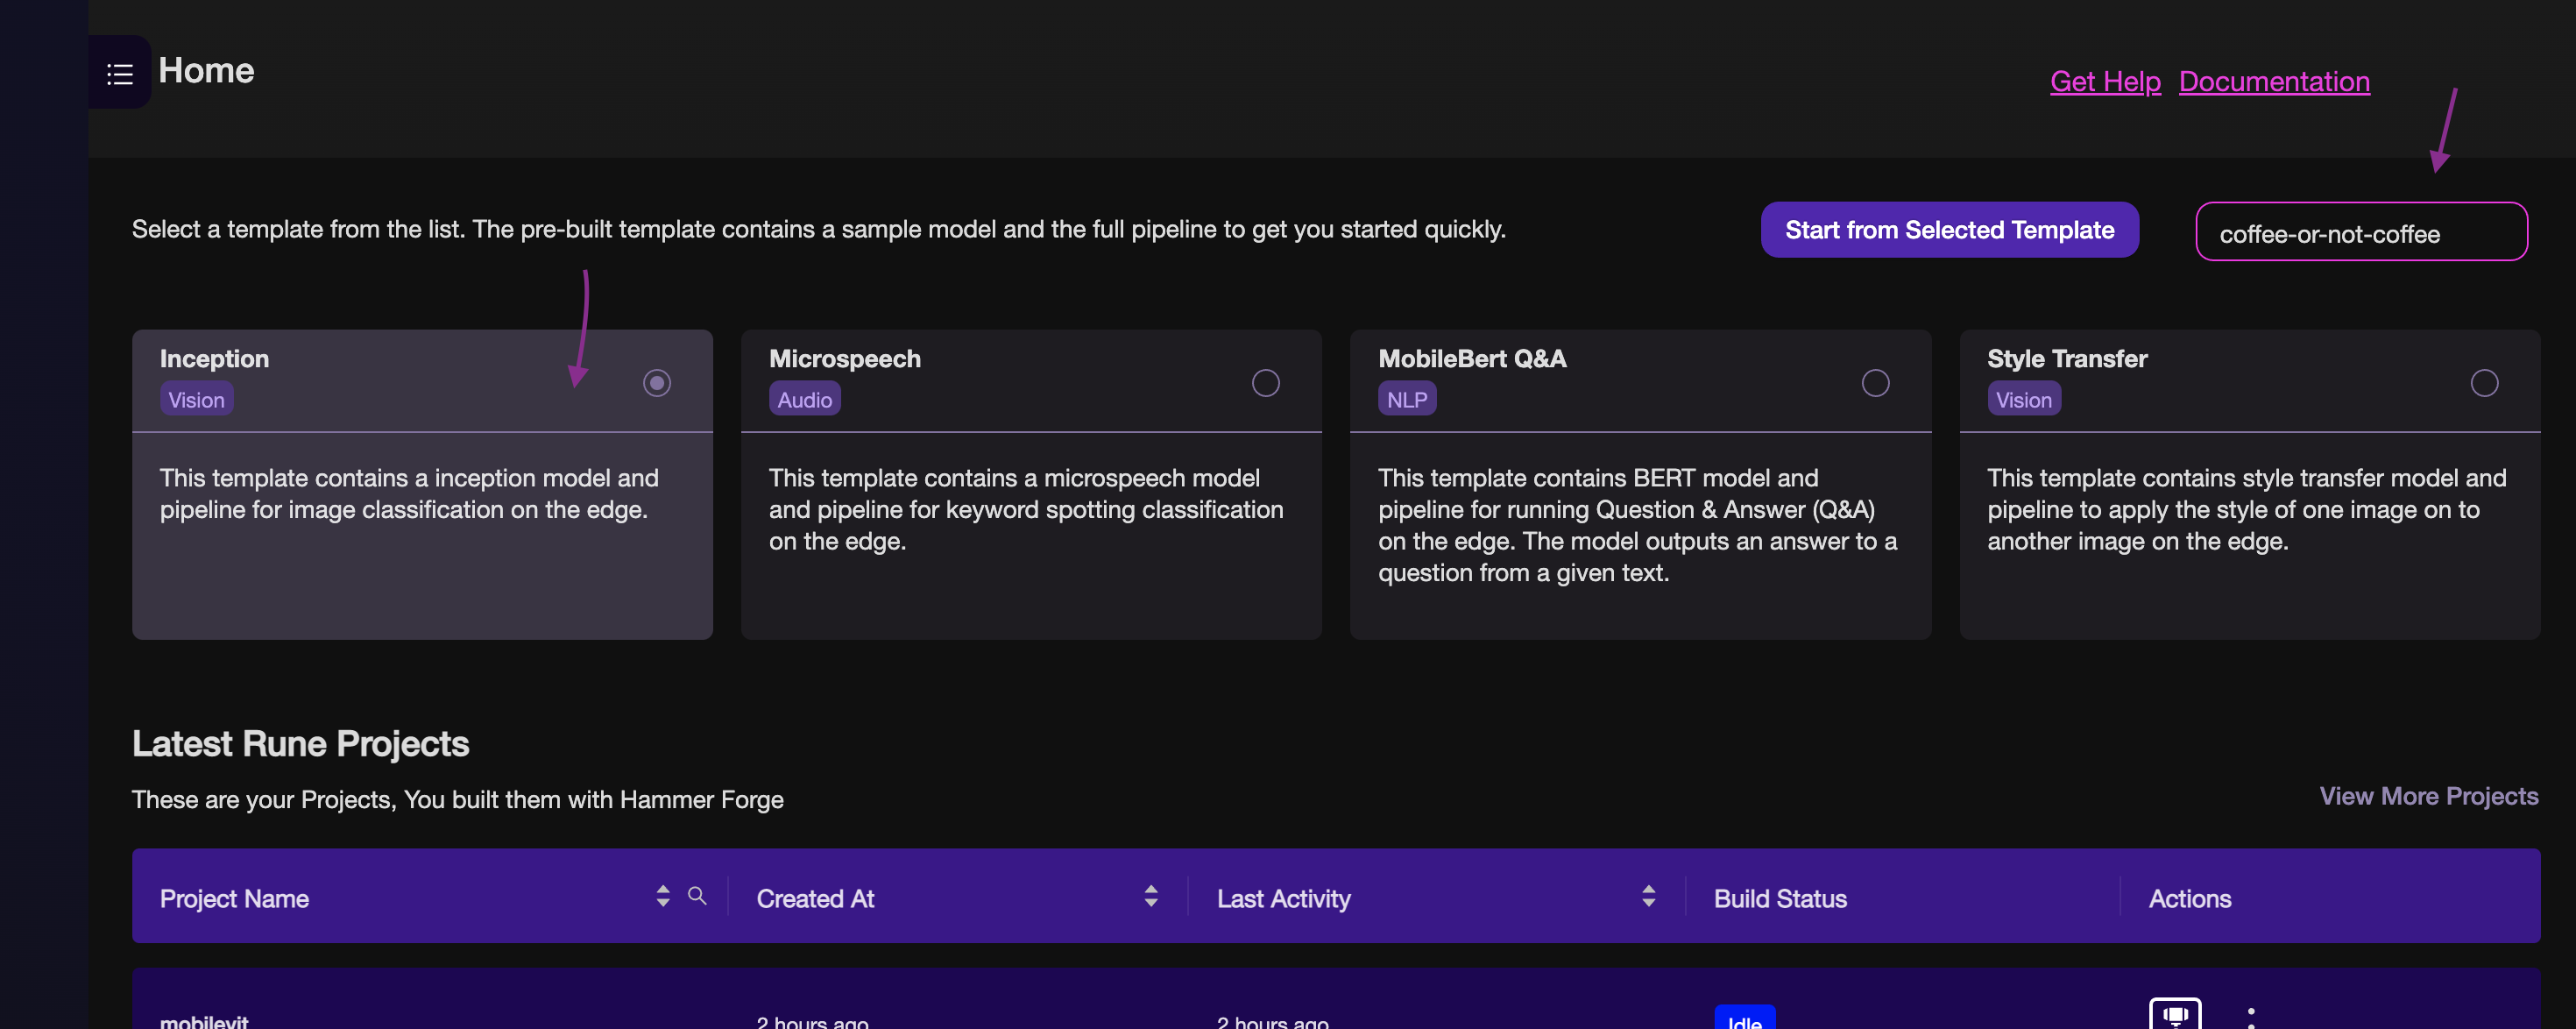
Now with a few simple steps you can drag and drop your model into the project. I walk through the steps in the video below.
Step 5: Build your ML Pipeline!
Steps:
- Upload your tflite model from step 3 into the project by dragging and dropping on the top left corner of the canvas.
- Lobe.ai models expect an input of f32 normalized images. So we need to add a preprocessing step to normalize the images. Drage the image normalization processing block on to the canvas.
- Modify the image input node and image normalization processing block to match your model input shape of 224,224,3.
- Next connect the nodes from Image, Image Normalization, and the model input port.
- Make sure to update the
Most Confidence Indicesto the1,1tensor shape so you get the top result. - Update the label processing block by uploading the
labels.txtprovided by Lobe.ai in step 3, and the tensor shape to 1. - Hit build! If you are successful you will see the Build logs show a success message and the test option will be available.
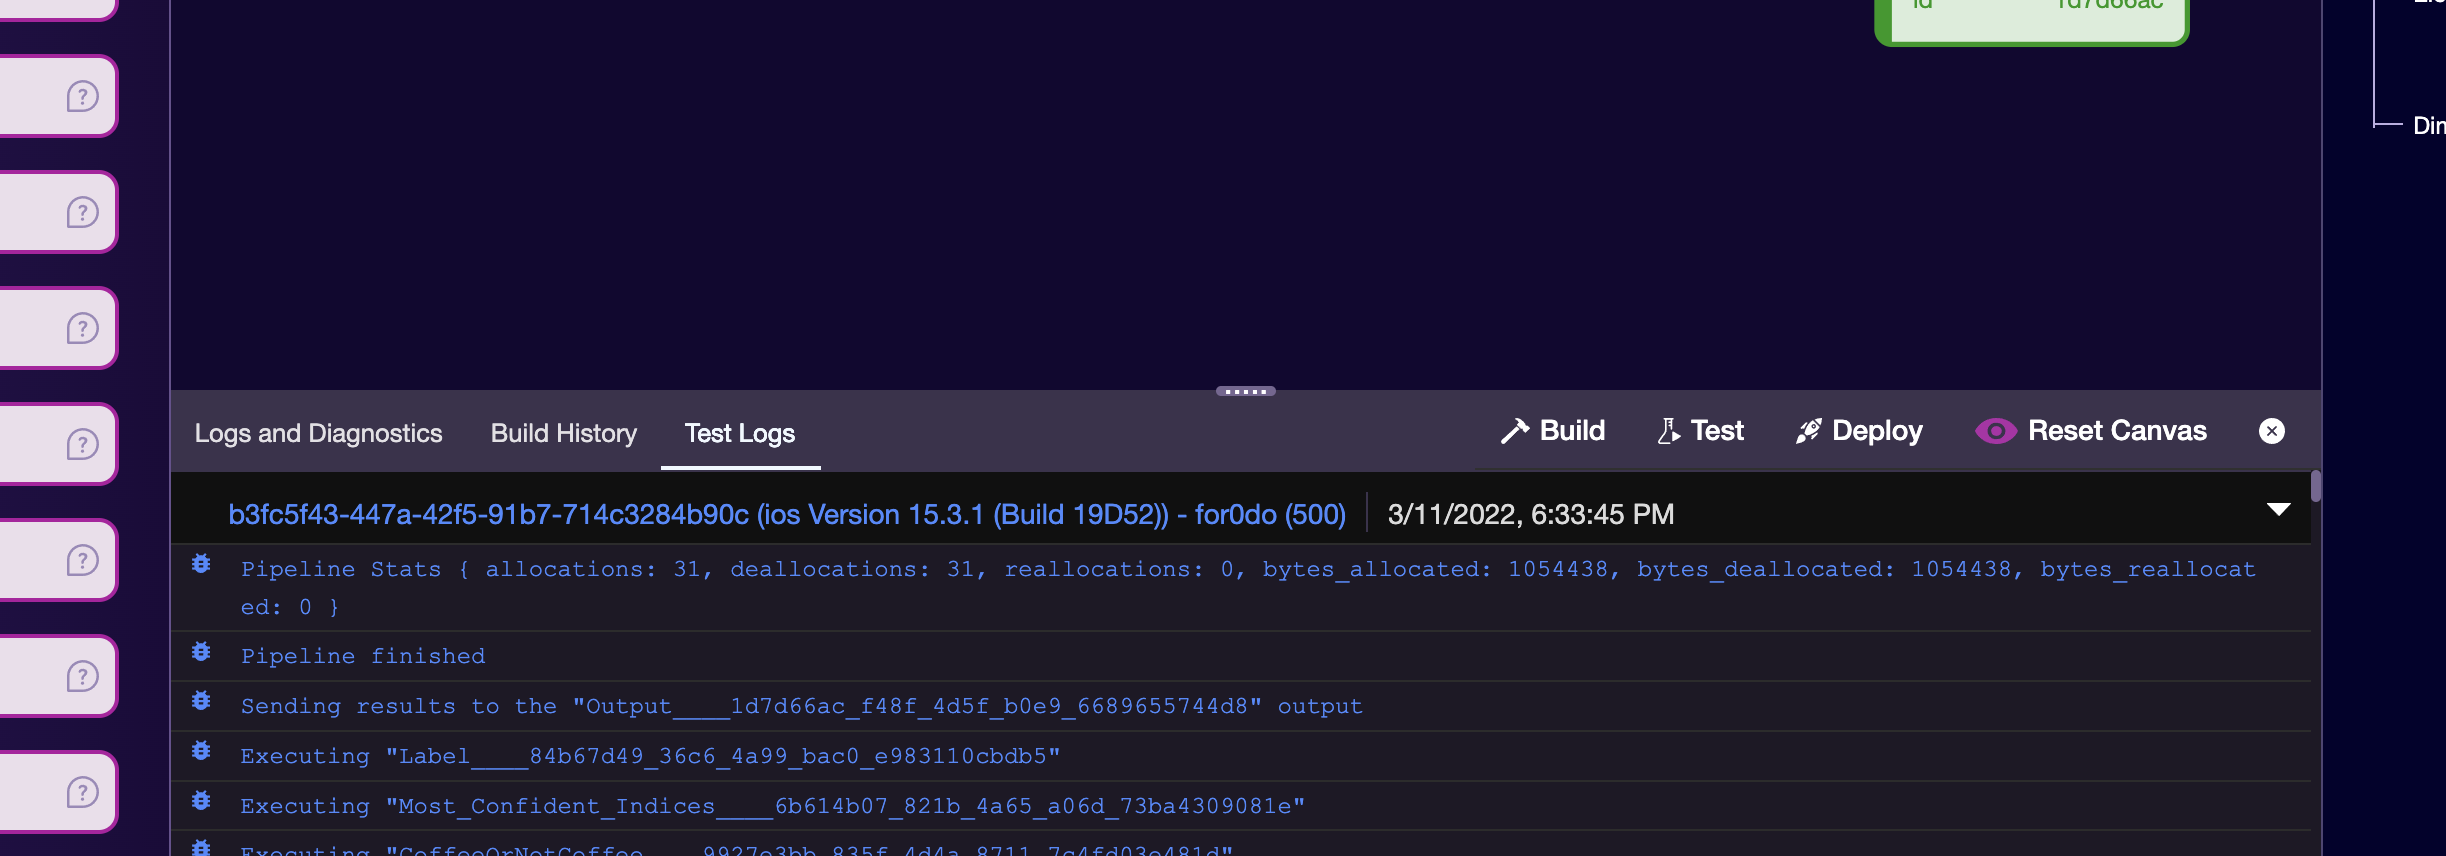
Step 6; Test your model on the Runic mobile app!
Make sure you have the runic mobile app which is available on iOS and Android.
You can then scan using the runic mobile app :)
During testing you will see your device logs on the bottom test logs panel.
Final Notes
Remember the more variation of images you take the better your model will be :)